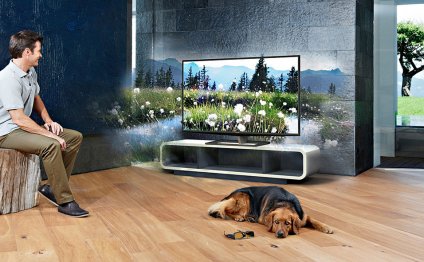
Digital TV installation
Steps
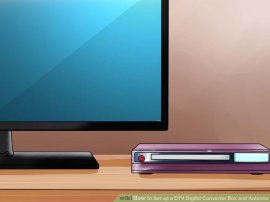
- Set the converter package next to the tv in an unobstructed area. The converter field should be nearby the tv as it will undoubtedly be linked to your tv with an included cable (or cables). The converter package can also be run by an included handy remote control, therefore it ought not to be behind an object which will stop the remote-control sign. Also, the converter field needs to be connected in, so must be near an electrical outlet or energy strip.
- Read the labeled connections from the straight back of the converter package so that you know where to link it and antenna.
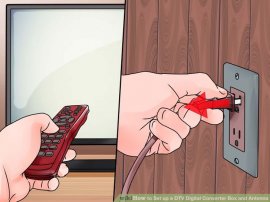
- Switch off your television and any other attached products. If utilizing an electric strip, also switch it down.
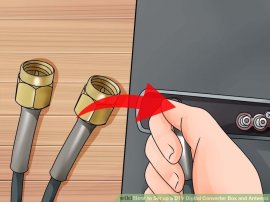
- Connect the converter package to an antenna with an RF coaxial cable. If you have an older antenna that'll not link straight to an RF coaxial connector, look at part for older TVs at the end regarding the Steps part. Any free-standing antenna can be utilized, however it is suggested that an antenna that is designed to pick-up DTV indicators be applied for optimal reception. Inexpensive rabbit ears and more powerful wall-mounted and outdoor antennas are plentiful.
- When working with a typical rabbit-ear design antenna, set the antenna near the television. Connect one end of an RF (coaxial) cable on ANTENNA RF IN connector on the converter box. Link one other end of the cable towards the TO television connector regarding antenna. It may be easier to get in touch the RF coaxial cable on antenna very first, or the RF coaxial cable may currently be connected to the antenna if it had been previously linked straight to the television. The antenna may also have a CABLE IN connector that appears just like the TO television connector. Be sure not to ever link the television to the connector. If antenna is operated, connect inside included energy adapter, but leave the antenna off until all the elements tend to be linked.
- If utilizing an outside or elsewhere mounted antenna, assemble it and connect it to a secure object. If antenna is outside, the RF coaxial cable that links the antenna to the television will need to go through home, typically via a hole that has been drilled within the wall. Connect the RF coaxial cable on antenna, and link the other end of this cable on ANTENNA RF IN connector in the converter field. In the event that antenna is operated, a segment of cable which was added to the antenna will likely must be set up between the converter field as well as the antenna along the same RF coaxial cable that connects the converter package toward antenna. This section of cable will likely be linked right to the converter box ANTENNA RF IN connector, and RF coaxial cable that runs to the additional antenna are going to be connected to the various other end regarding the driven section. The powered portion must be plugged into an electrical adapter which connected to a wall plug.
- Connect the converter box into tv. With respect to the provided cables, the design associated with converter box, in addition to design associated with television, there might be other ways to get in touch the converter box to your tv.
 Many converter boxes could have a connector for an RF coaxial cable and connections for composite cables. For those who have an adult television that'll not connect straight to an RF coaxial cable or composite cables, begin to see the area for older TVs at the bottom of this Steps part. Composite cables contains one yellowish video cable and two sound cables. The sound cable the right speaker is purple and the cable left speaker is white.
- The most common method is to link the converter field and also the television with an RF (coaxial) cable. This particular cable should be provided with the converter box. Just link one end of the RF coaxial cable towards the television RF OUT connector on converter field, then link others end regarding the RF cable to your similar cable connector this is certainly regarding tv. This connector from the tv is defined as VHF/UHF.
- Alternatively, the converter are often attached to the tv with one composite movie cable as well as 2 audio cables rather than with the solitary RF coaxial cable if these connections occur on the tv (the converter box should link to an antenna with an RF coaxial cable). This choice is especially of good use if you are going to be hooking up another speakers or self-powered stereo speakers, while the video clip and also the audio are passed away through individual cables. The composite movie cable connections regarding the converter field and on the tv will be yellowish, even though the composite audio connectors may be purple and white. The red cable is for the best presenter, together with white cable is for the LEFT presenter. Attach the sound and video clip cable towards the converter package. After that link the yellow-tipped video clip cable to the yellow MOVIE IN connector on television. Following, link the red-tipped audio cable towards the red SOUND IN APPROPRIATE connector from the tv, and connect the white-tipped sound cable to the AUDIO IN LEFT connector in the tv.
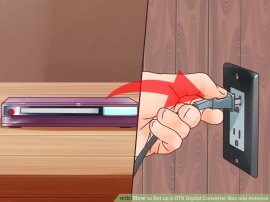
- Connect when you look at the converter package. The converter package is added to an electric adapter or may have a permanent, standard power cord. If it offers a power adapter, simply plug the adapter into a wall plug or energy strip and connect the ability adapter to the converter package. If utilizing an electrical strip, plug the converter field into a powered-off power strip, after that switch on the power strip.
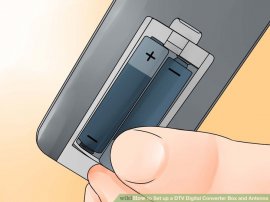
- Added electric batteries when you look at the converter package handy remote control. Battery packs for the handheld remote control may be incorporated with the converter box.
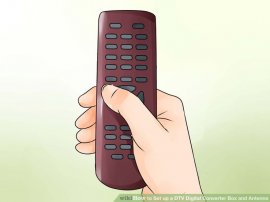
 Familiarize yourself aided by the remote control. It controls many television and converter field functions. If the remote included is a universal automated remote, it's going to be capable get a handle on all television functions after it has been manually set to achieve this.
- Start it and set it up to channel a few. This is not done with the converter field remote, but with it remote or by running the TV manually (unless the remote can be programmed to be used specifically for the TV). The converter package will simply show pictures regarding the TV when the TV is placed to 1 of those channels. The converter field should be set-to channel 3 or 4, whichever corresponds using the channel that TV is defined to. This can be done by hand by means of a switch from the converter field, or utilizing the on-screen converter package selection (see next thing).
- Energy regarding the converter field using converter box radio control or by pressing the energy key on converter box unit.
- If converter package may be set-to channel 3 or 4 making use of the on-screen menu, set it to your desired station if required.
- 10
Scan for networks. Go into the on-screen selection and permit the converter field to immediately scan for networks. Automated checking will discover readily available networks and exclude all others. If you don’t accept numerous networks, you may need a much better antenna or it might be necessary to place your antenna in a new area.
- Once you learn that one networks should always be received but they aren't picked up right-away during the automated channel scan, you can include them utilizing the on-screen selection, and adjust the antenna until they're received.
- Yet another station scan can be carried out utilizing the on-screen menu whenever you want to search for and add stations that were perhaps not acquired during initial channel scan.
- Channels that are received and had been included with the channel number but they are maybe not desired are removed with the on-screen menu making use of the channel edit (or similar) function.
-
11
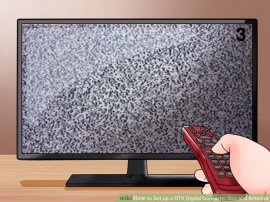
Look at the reception and signal energy. Bad reception utilising the converter package will look "pixelated" or "blocky". The antenna might need to be modified or place in yet another location. Bad reception may also present as a "NO SIGNAL" or "NO PROGRAMMING" message on the TV display, but this may also suggest there is no channel to get whatsoever. To check sign strength for a specific station immediately, utilize the "alert strength" or comparable alternative utilizing the handheld remote control. Adjust the antenna with all the signal energy solution to see just what antenna arrangement or location provides the most useful image. If making use of an antenna which attached from the television, eg a rooftop antenna, anyone can monitor the alert power signal on TV, as the other moves or changes the antenna.
- 12
Set the required image "aspect proportion" format. The converter field may initially show the television pictures in aspect proportion platforms which can be created for widescreen HDTVs. You will have numerous different image sizes or aspect ratios seen from the television according to the station and/or the particular program, in addition to aspect proportion can be modified via the converter package selection to better healthy standard 4:3 analog TV screens.
- Shows that are shown in widescreen structure can fill the screen from the remaining and correct edges of this television, however on the top and base of the television display screen. Although a number of the top and base of this television screen is not utilized, this will be a desirable format because more of the original filmed picture is visible in the display screen.
- To show programs in widescreen structure (that fills the display screen in the left and correct sides), choose "letterbox" and/or equivalent aspect proportion option. The "auto" choice may also attain exactly the same outcome.
- Some shows will be shown in a 4:3 structure that'll totally fill the television display. Programs shown within format should completely fill it display screen whatever the aspect ratio format that's been plumped for.
- Some programs is only going to fill the middle of the screen (there will be unused aspects of the television display on the remaining and correct sides as well as the top and bottom). These types of programs could be in a shrunken 4:3 structure or perhaps in a shrunken widescreen format. These programs will have to be cropped to correctly fill the display screen.
- To make sure that the image will fill the television display relatively really for several stations, adjust the aspect proportion to "cropped" making use of the on-screen menu.
- Shows that are shown in widescreen structure can fill the screen from the remaining and correct edges of this television, however on the top and base of the television display screen. Although a number of the top and base of this television screen is not utilized, this will be a desirable format because more of the original filmed picture is visible in the display screen.
-
13
RELATED VIDEO

Share this Post
Related posts
Digital TV Aerial Installation
Digital Terrestrial Television (DTT) is regarded as various means of getting Digital tv (DTV) home. But to be able to obtain…
Read More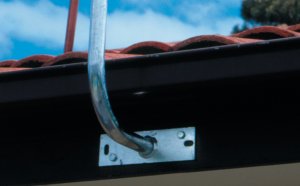
Digital TV antenna Sydney
The switch means Australians have significantly more networks and improved picture and sound quality. Another objective of…
Read Morelatest post
-
 SiriusXM XM Radio for Home March 8, 2025
 -
 Digital TV installation February 16, 2025
 -
 Digital Antenna installation Melbourne January 27, 2025
 -
 Installation of TV antenna January 7, 2025
 -
 Install roof antenna December 18, 2024
 -
 Antenna TV Installation November 28, 2024
 -
 Attic Antennas for digital TV November 8, 2024
 -
 Which antenna? October 19, 2024
 -
 TV Aerial help September 29, 2024